[ad_1]
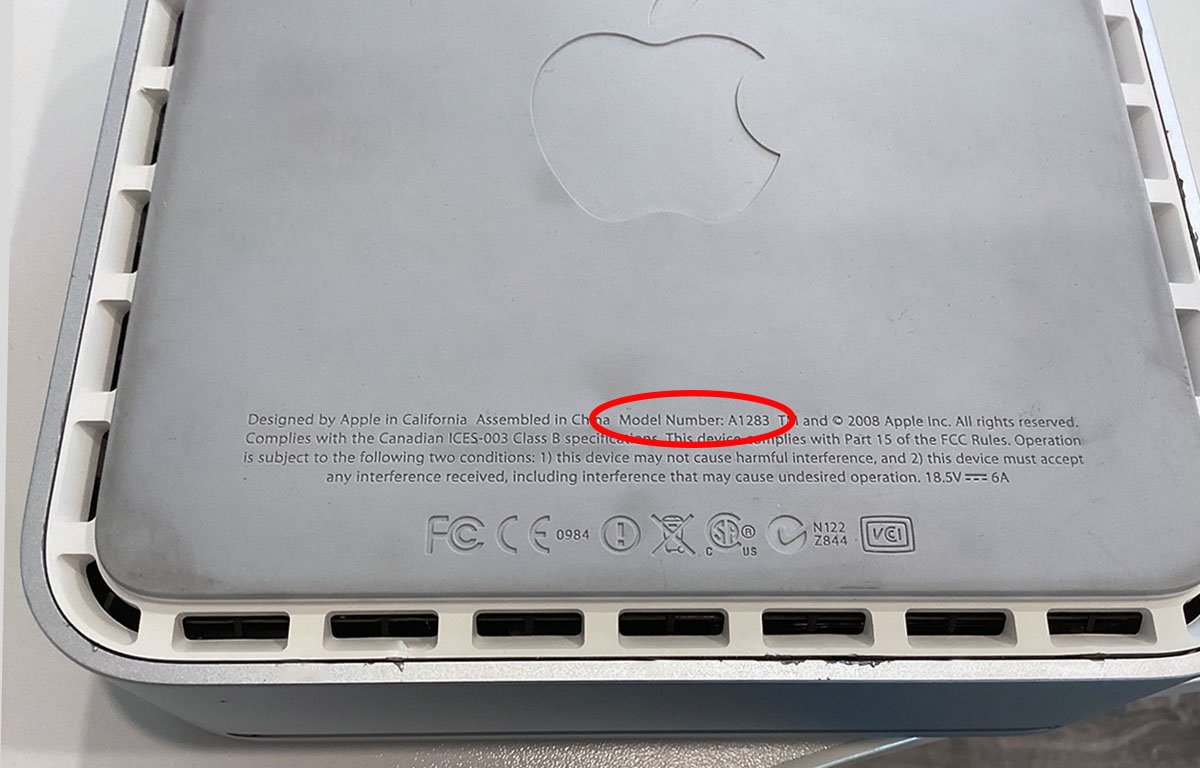
tenth technology Mac mini 2.26GHz.

Refurbishing the final of the plastic physique Mac minis is fairly simple — as soon as you already know a couple of methods. Here is the way to get that 15-year previous pc up and operating once more, and sooner in addition.
Like its predecessors, the tenth technology mannequin had an aluminum/polycarbonate plastic shell with a plastic/rubber base and an inside plastic drive provider.
The two.26 Ghz mannequin was one of many final polycarbonate fashions made earlier than Apple switched to the all-aluminum unibody design.
There have been basically three subfamilies of the unique minis, spanning 10 “generations.”
The ultimate mannequin within the polycarbonate collection was a mini server. This mannequin lacked an inside DVD-R drive and which as an alternative contained two an identical 500GB laborious drives.
The ultimate polycarbonate mini fashions shipped in June 2010. All the line spanned roughly 5 years.
You possibly can nonetheless discover many of those machines in on-line retail and public sale websites similar to eBay for a really cheap worth.
We paid nearly $60 for ours which included the 120V energy brick, a mini DisplayPort to VGA video adapter, in addition to an unique Apple Magic Mouse.
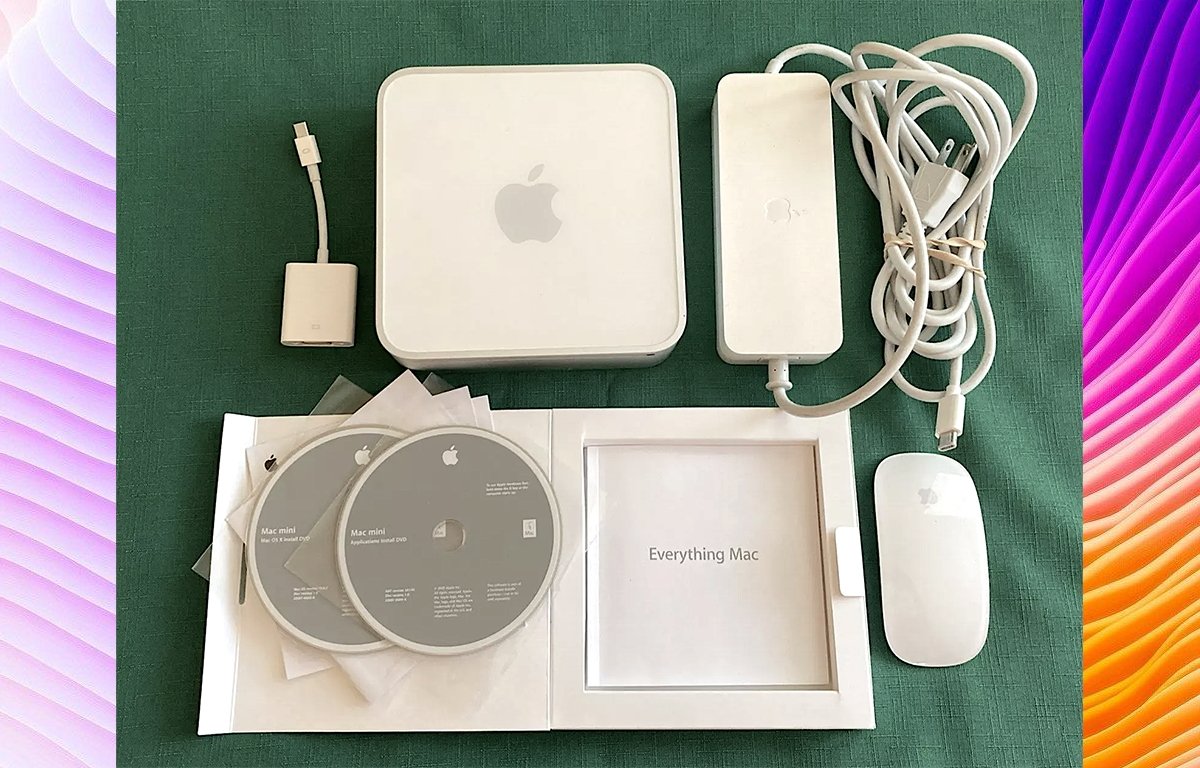
Mac mini eBay haul: VGA adapter, mini, energy brick, DVDs, and an Apple Magic Mouse.
Not like the sooner mini fashions, Apple made some inside enhancements to the two.26 and later fashions which makes refurbishment a bit simpler.
Take into account nevertheless, refurbishment is an in depth course of and is just for these assured of their restore skills. The Mac minis comprise lots of tiny elements and screws, and with fifteen-year previous plastic, elements can break simply.
Try this restore at your personal danger.
As with earlier mini refurbs, you will want a particular set of instruments to open the machine:
- A 4.5-inch (11.5cm) wall spackling device
- A medium magnetized Phillips-head screwdriver
- A tiny magnetized Phillips-head electronics screwdriver, or jeweler’s screwdriver
- A small flat plastic or steel spudger
- Scissors
- Compressed air or an air compressor
- A vibrant flashlight
- Shiny room lighting
- Optionally a small magnifier or jeweler’s loupe
- Kapton tape
- A CR2032 substitute button-cell battery
Step 1: Open your Mac mini
Utilizing both a big soldering mat, or a delicate material or towel, lay your Mac mini the other way up in preparation to open it.
You may use a large spackling knife to open the case. There’s an artwork to this however if you happen to’re cautious it isn’t too troublesome.
To open the case, orient the pc with the entrance in the direction of you, high down. The machine’s ports needs to be going through away from you.
Lay your Mac mini face down in preparation for opening.
Insert the spackling knife into the seam on the precise aspect of the machine, and pry up and to the precise in a single sharp movement. This could loosen then case from the highest shell.
Subsequent, insert the knife into the entrance seam and repeat the method. At this level the case needs to be free sufficient from the highest cowl to take away it.
Set the highest cowl apart for later cleansing.
Case open, high cowl on left. Notice the three antennae on the perimeters.
Now flip the bottom of the machine over. You may see the DVD drive on high, an AirPort antenna on the precise aspect, and two Bluetooth antennae on the left aspect.
The antennae are held in with plastic clips and is derived, which if you happen to pinch and pull up will free every antenna. Go forward and try this now (rigorously) and set the three captive springs apart for later.
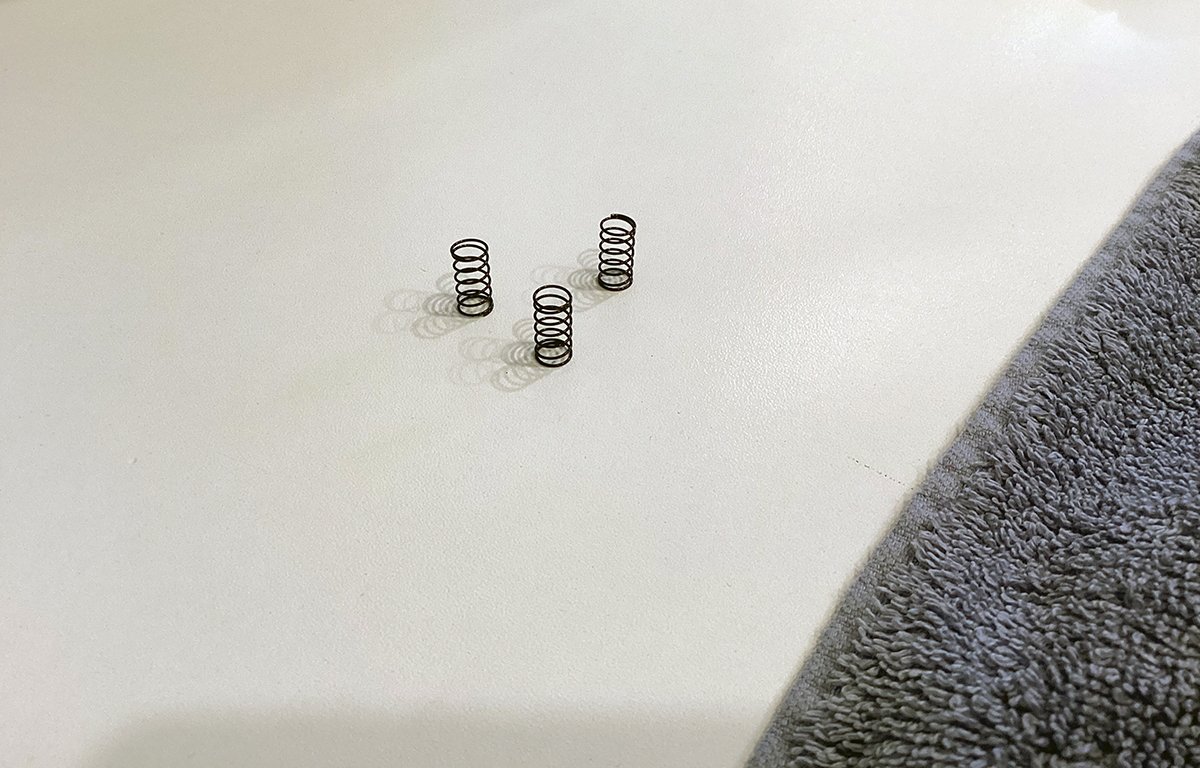
Antennae springs.
A cursory look across the machine reveals 4 small screws holding the highest DVD optical drive in, in addition to two small screws on the rear of the drive which maintain a small SATA board on.
There’s additionally a really small audio ribbon cable on the SATA drive board on the rear. This is likely one of the enhancements Apple made to later mini fashions: the audio cable is held in by nothing however friction and you’ll take away it simply with a small plastic spudger or screwdriver.
Gone are the two-part plastic ribbon cable clips which had been inclined to wreck and really troublesome to re-seat correctly.
Go forward and take away the audio cable and set it apart additionally now.
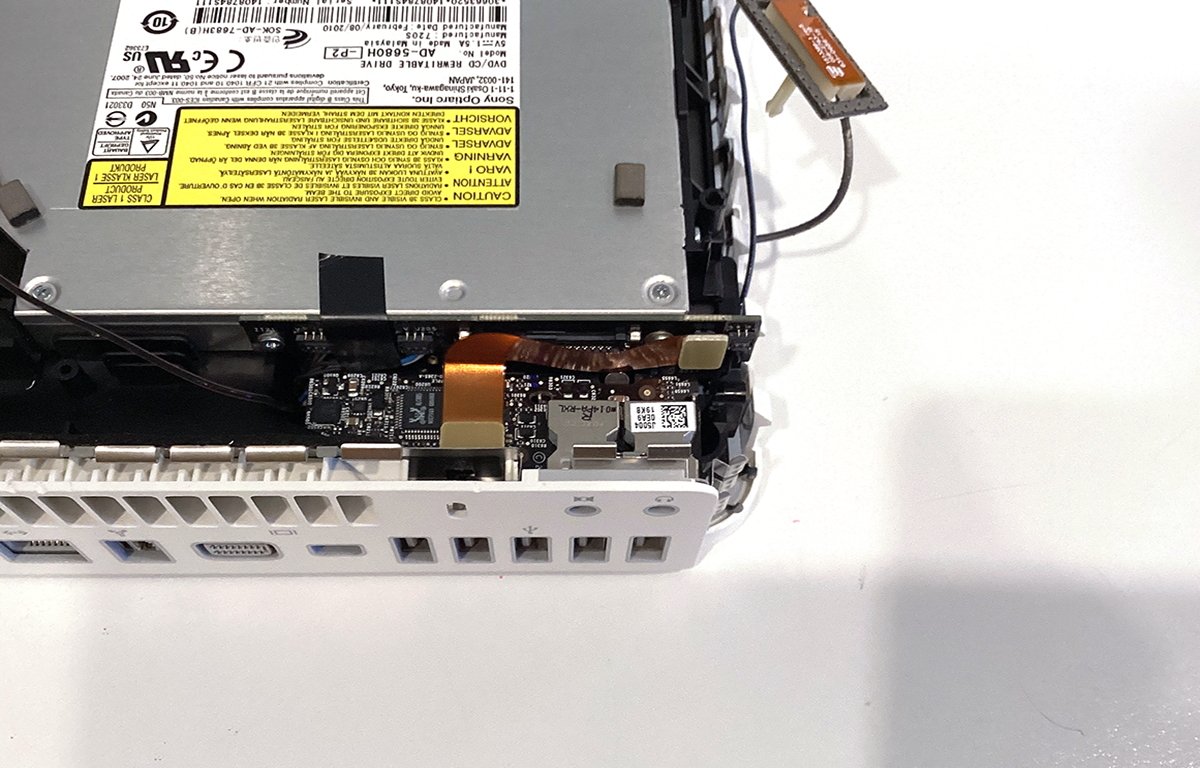
Rear DVD drive board with audio cable.
Step 2: Take away the DVD-R drive
Subsequent, utilizing a tiny screwdriver take away the 4 small screws which maintain the DVD-R drive to the plastic drive provider. Two of those screws are simple to entry on the left aspect of the machine, however the different two are positioned in recessed holes on the opposite aspect.
Rigorously take away the screws and set them apart.
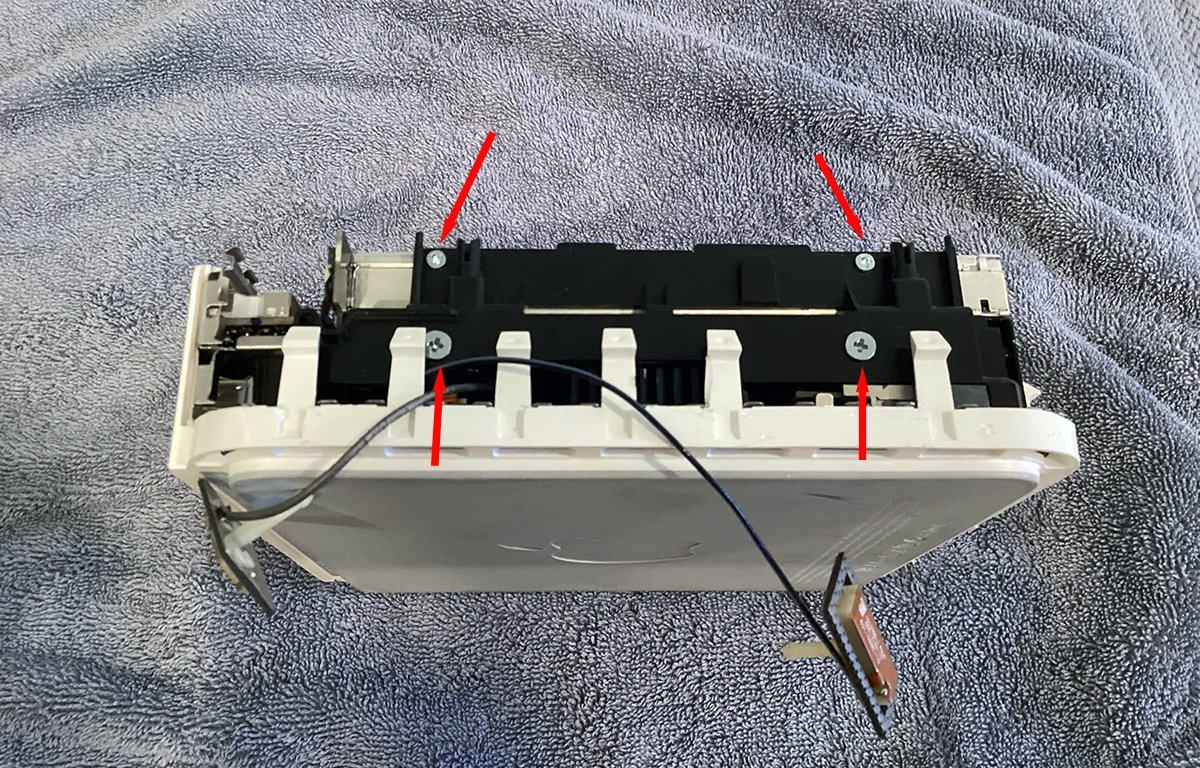
DVD and laborious drive screws.
Subsequent, spin the machine round so the rear faces you, then take away the 2 tiny screws which maintain the small SATA drive board to the rear of the DVD-R drive.
It’s best to now be capable of carry the DVD-R drive up and ahead to free it from the provider and the SATA board.
Notice that the SATA board is connected to the drive provider by a single wire so be certain to not disconnect the wire.
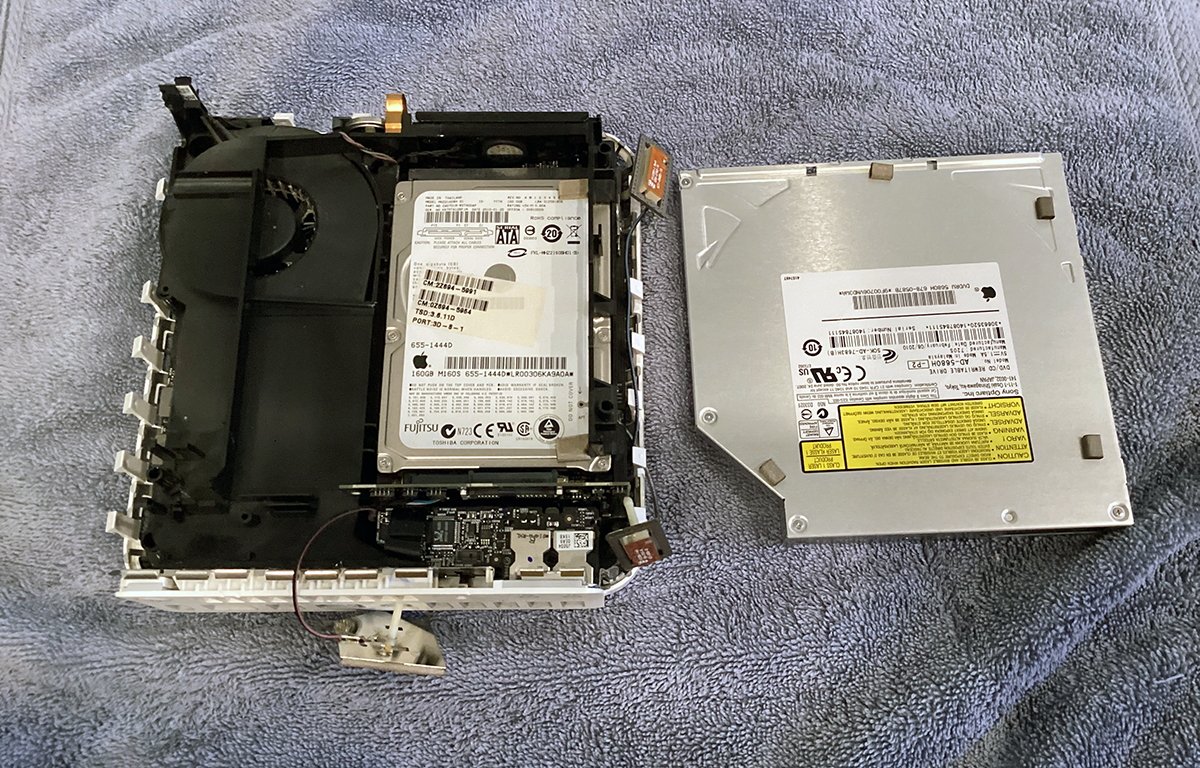
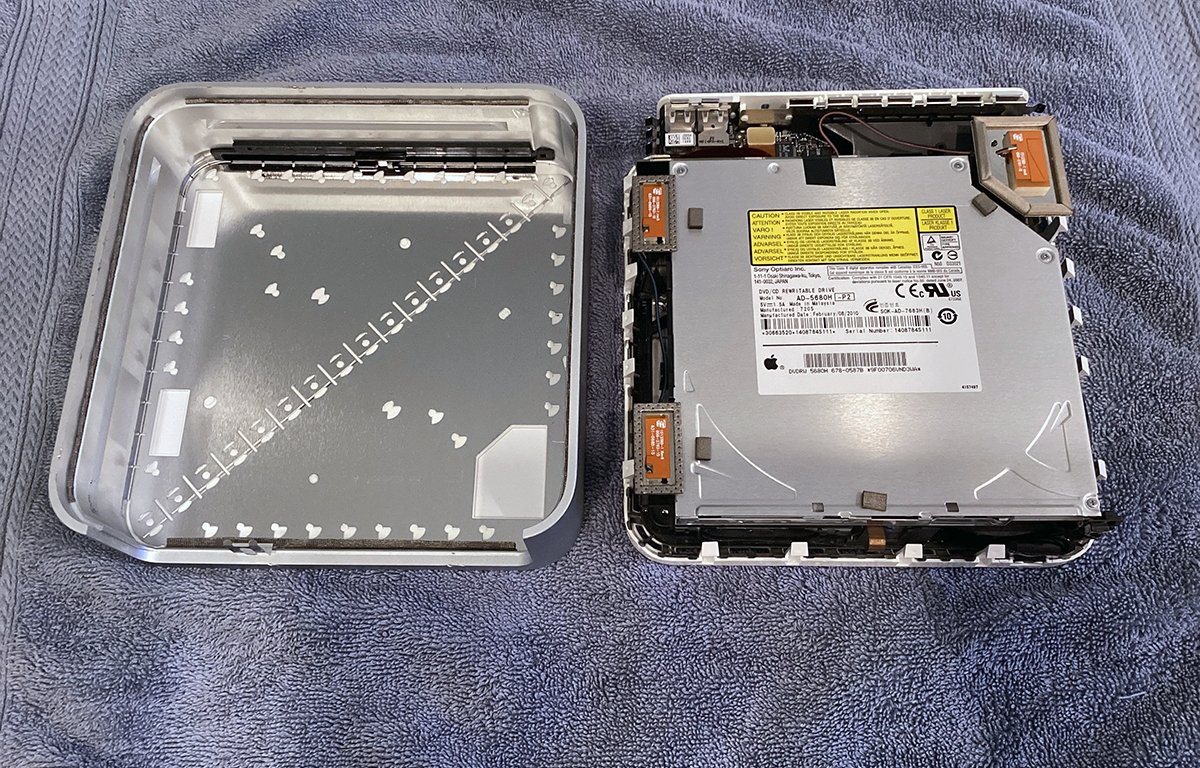
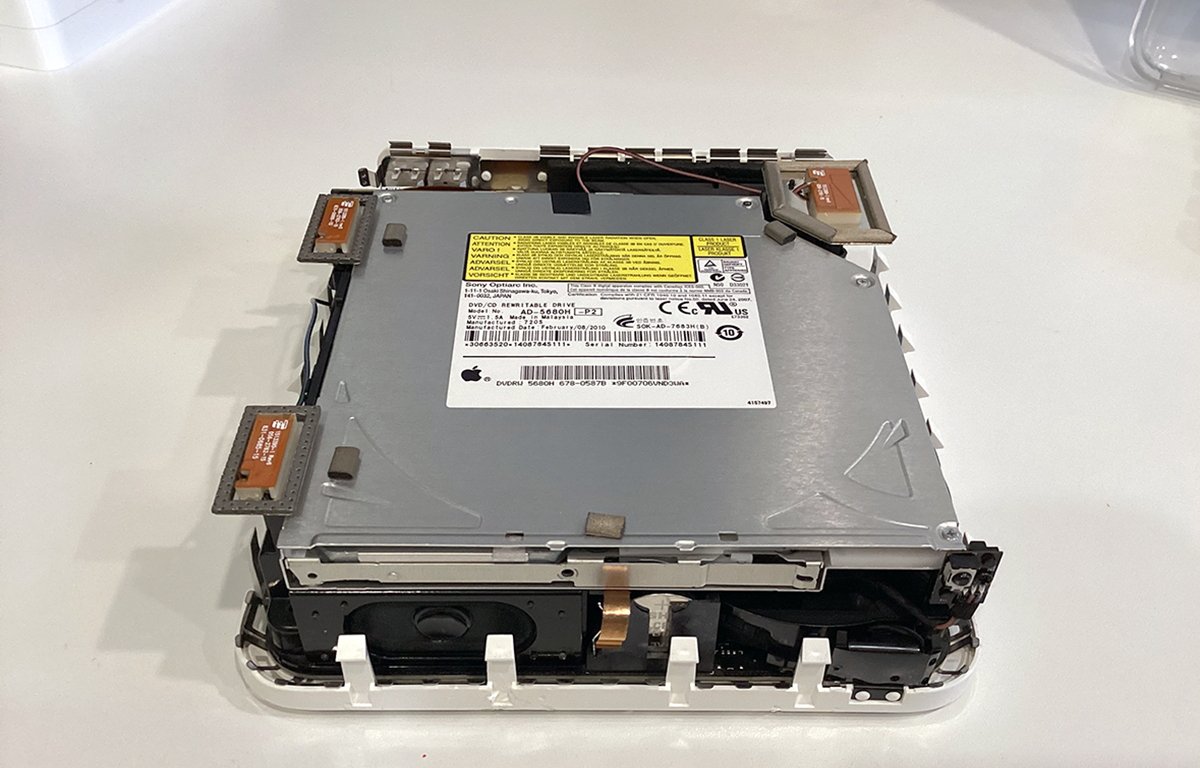
DVD-R drive faraway from provider.
One of many enhancements Apple made to the later mannequin minis was a smaller, lighter DVD drive. Ours had Sony mannequin AD-5680H-P2 in it.
These DVD-R drives are remarkably mild, environment friendly, and are constructed from super-miniature elements. They’re additionally extra quiet and run cooler than their predecessors.
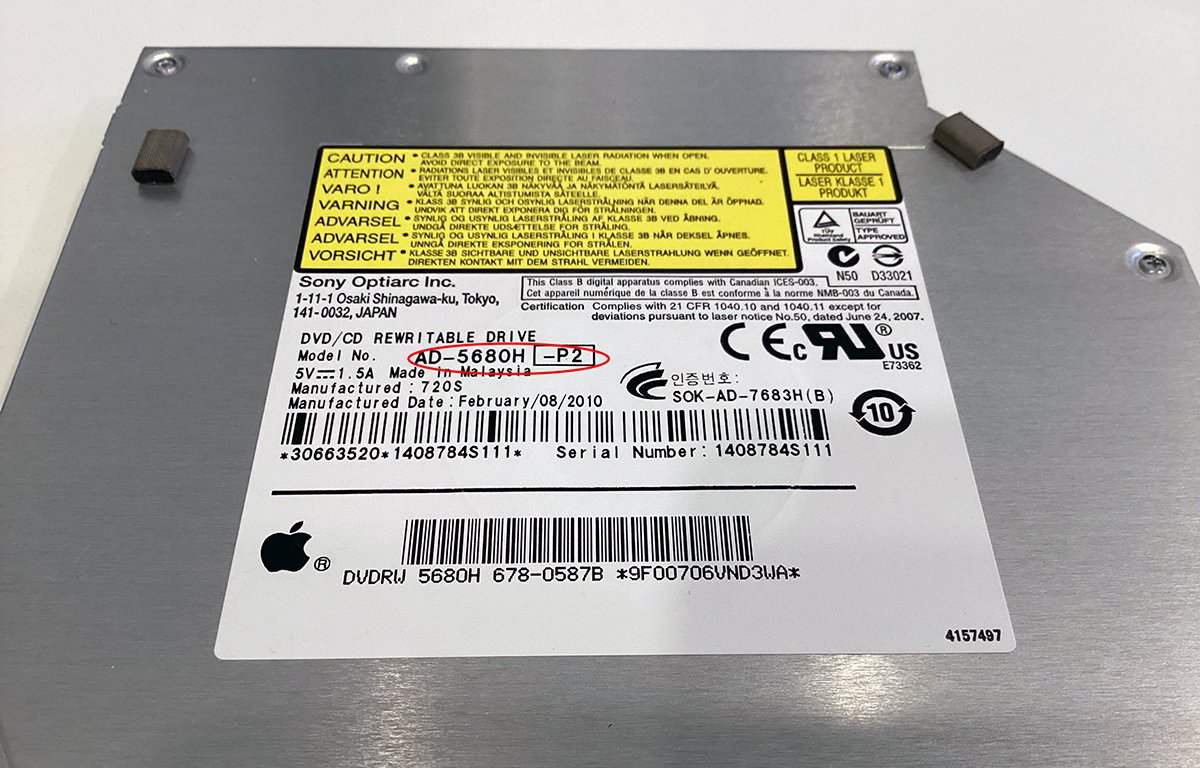
Sony Optiarc AD-5608H-P2 mannequin.
The one draw back to those drives appears to be the sluggish entry time. Nonetheless, although, it’s nonetheless sooner than the entry time within the drives discovered within the first Mac minis.
Step 3: Take away drive provider from the bottom
Now find the 4 tiny black screws on the 4 corners of the plastic drive provider. Two of those screws are recessed in spherical enclosures, and two of them are uncovered on the provider.
Take away all 4 screws and carry the drive provider away from the machine’s base. Notice that the SATA board holds the provider right into a connector slot with friction so it could take a little bit pressure to take away the provider.
As soon as the provider is freed from the bottom, set it apart for later.
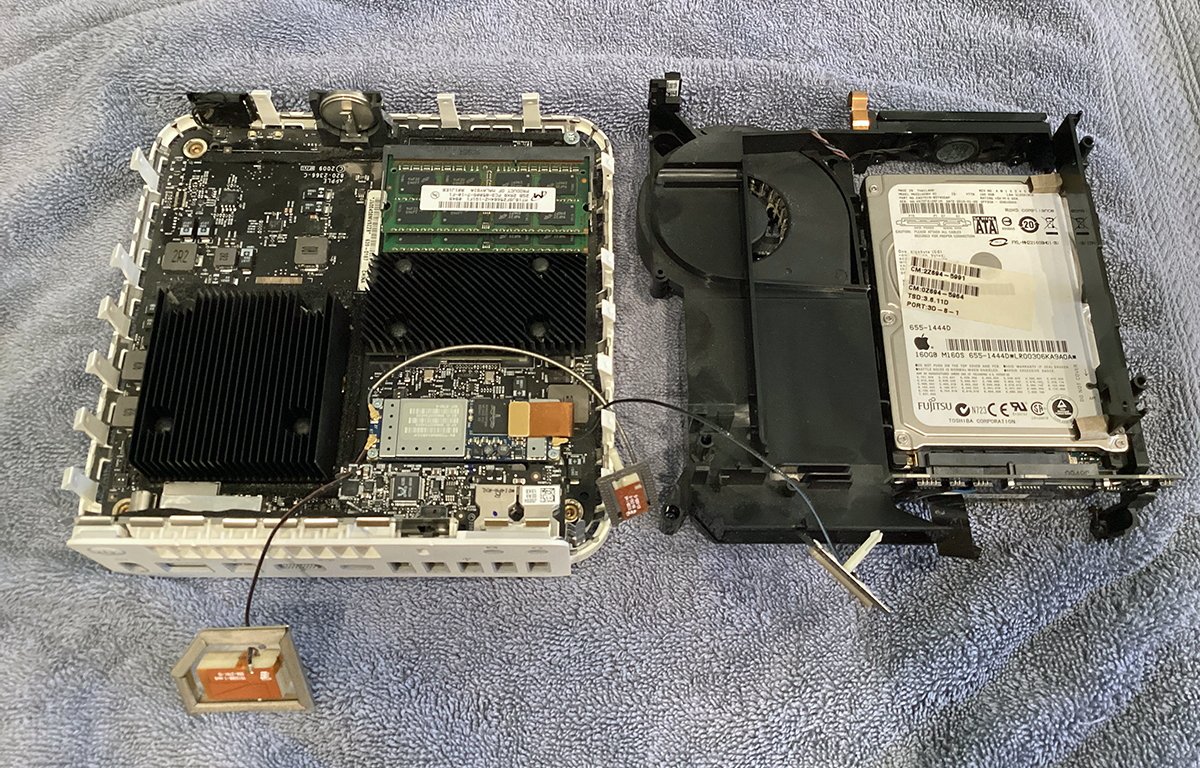
Drive provider, proper, and Mac mini base with motherboard, left.
Notice the small copper clip on the entrance of the bottom. This clip has to contact the within of the machine’s steel cowl or the machine will not boot when powered on.
Additionally discover the small coin-cell battery to the precise of the clip on the bottom’s entrance. This battery retains the inner clock and VRAM settings intact when the machine is powered down.
Step 4: Clear the bottom, exchange clock battery
Subsequent, utilizing compressed air or an air compressor, blast any mud from the bottom, together with across the CPU heatsink, the WiFi board, and the rear vent ports.
You may additionally need to rigorously take away the RAM DIMMs from their slots to wash underneath them. Watch out when eradicating the RAM because the sockets are plastic and may break simply.
The default RAM configuration for this mannequin is 2GB. Our machine contained 4GB of Apple-installed RAM (2GB X 2).
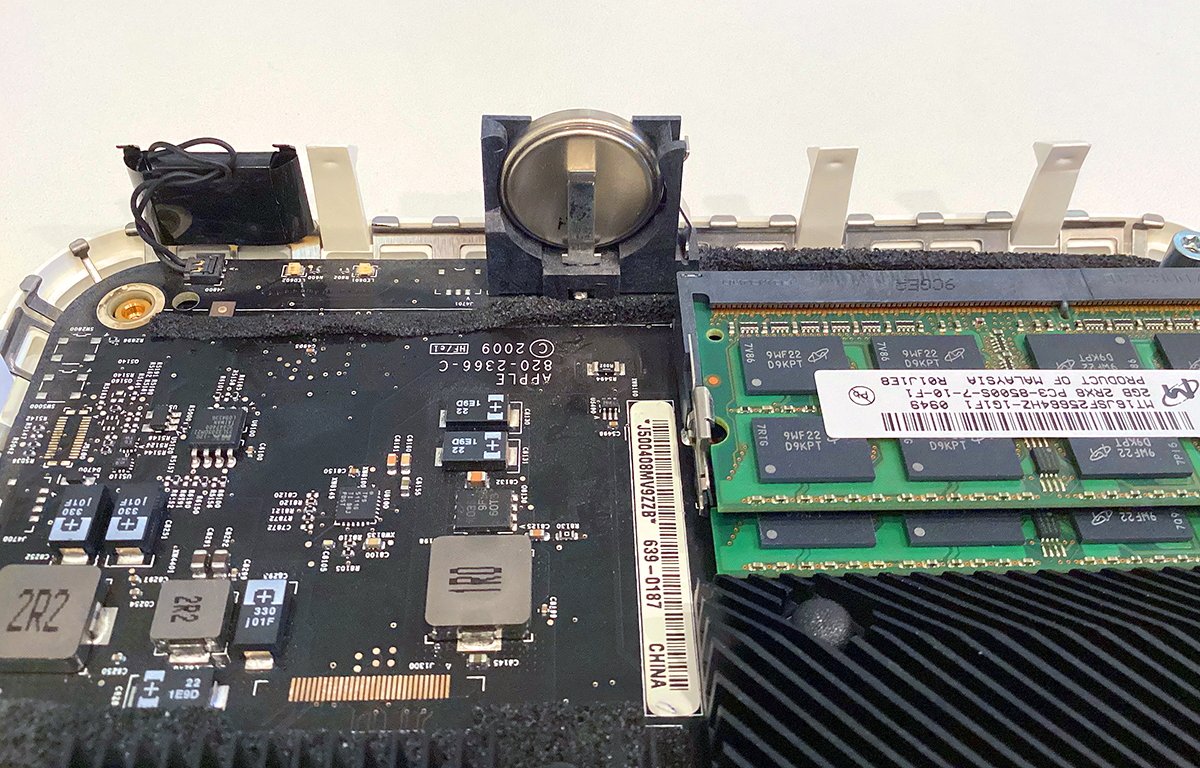
Mac mini base with motherboard. Notice left to proper: LED meeting, coin-cell battery, and RAM.
Notice that the combo WiFi/Bluetooth board additionally has a small ribbon cable and the three exterior antennae connected to it with small pin clips.
These connectors are very simple to jar free – so be certain you do not bump the antennae wires and disconnect a number of of the antennae. In actual fact, you could need to add small strips of Kapton tape to every of the antennae connectors to verify they do not come free:
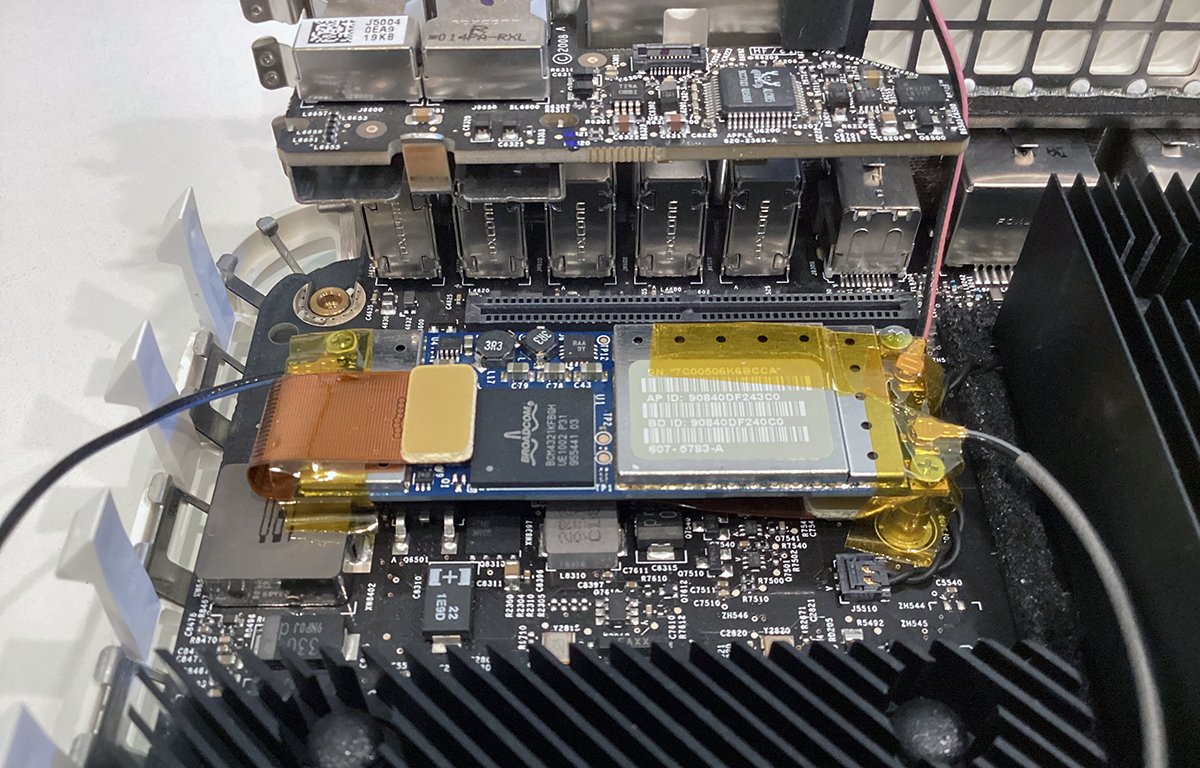
Mac mini combo WiFi/Bluetooth board with Kapton tape added.
So as to clear beneath it, you possibly can take away the WiFi board by eradicating its small screws if you happen to like. Except your machine is exceptionally soiled you in all probability need not.
Compressed air ought to suffice.
You may additionally need to use a small dry paint brush to wipe away any extra mud from across the base edges and the on the motherboard. Do not use an excessive amount of pressure because the parts could also be fragile.
On the entrance of the bottom is the CR2032 coin-cell battery. To take away it, rigorously carry up on the clips on the precise and high of the battery holder, and pull the battery away from the holder to the rear.
Change the battery with a brand new an identical one by dropping it down into the holder and urgent down and ahead. Do not use an excessive amount of pressure because the holder is plastic and may break simply.
Lastly, clear all of the rear ports on the machine, together with the fan ports through the use of cotton swabs with 80% isopropyl alcohol. Cleansing the rear fan ports ensures there is no residual mud scent whenever you restart the machine later.
Step 5: Non-compulsory – Change RAM
When you like you may also exchange the RAM as much as a most of 8GB by changing the 2 current 1GB SO-DIMMs with two 2GB, or 4GB fashions. You may want PC3-8500 DDR3 DIMMs.
To take action, merely unclip the 2 current DIMMs and exchange them with two new ones. Reminiscence upgrades can be found at a number of on-line retailers.
Our mannequin got here with 4GB RAM customary at 2GB per DIMM. We determined to depart it at that.
However if you happen to’re planning on operating the inventory Mac OS X Snow Leopard (10.6.8), you doubtless will not want 8GB because the machine runs fairly properly with 4GB. The decrease 2GB amount might be sufficient for many duties.
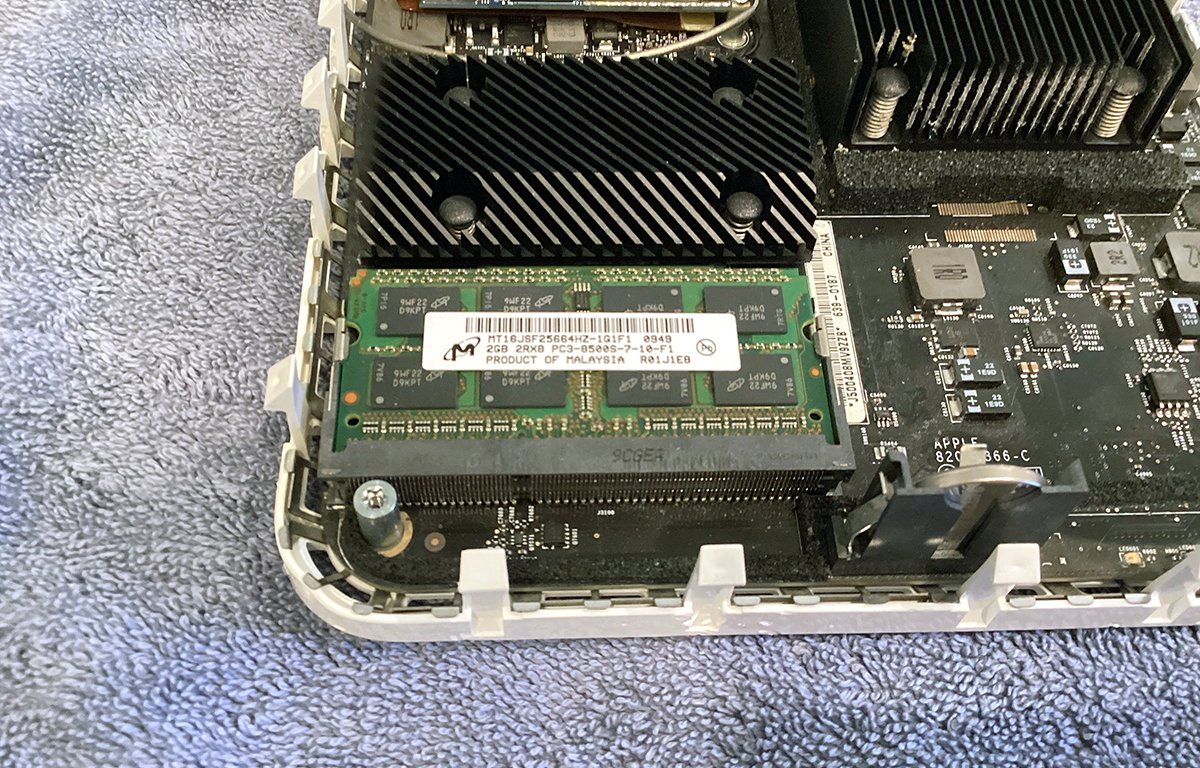
Authentic Mac mini SO-DIMMS – on this case 2GB X 2.
Step 6: Clear the drive provider, fan, and exchange the laborious drive
The plastic drive provider holds the inner laborious drive, a small cooling fan, and a small thermal sensor which detects drive overheating.
The sensor is held on to the entrance of the laborious drive with rubber cement, however you possibly can doubtless simply peel it off and reapply it to a substitute SSD with none further glue.
To take away the drive, flip the drive provider over, lay it face down, then take away the 4 screws on the underside holding the drive in. You may want to slip the drive out sideways, and disconnect it from the SATA board.
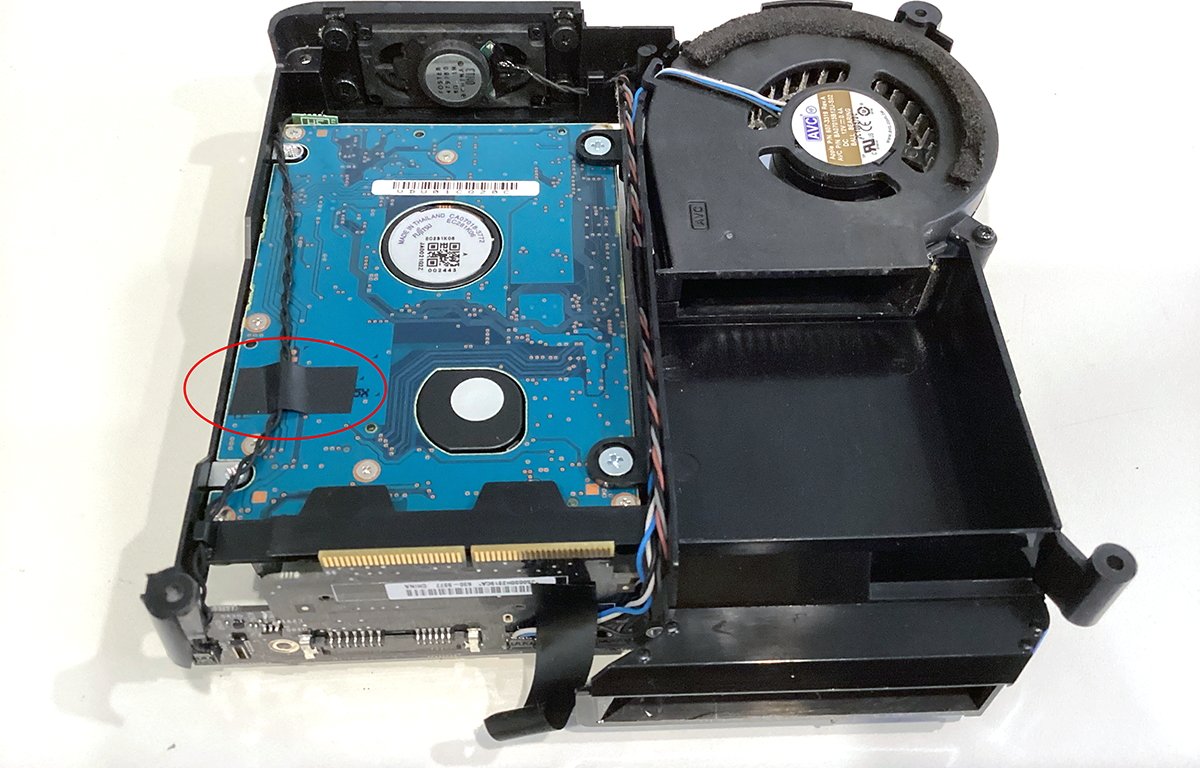
The drive provider, with the laborious drive on the left. Notice the tape.
Watch out because the thermal sensor continues to be connected to the SATA board by its wire and you do not need to pull it free.
As soon as the drive is free, take the drive provider outdoors and blast the fan and and its outlet duct clear of any mud with compressed air.
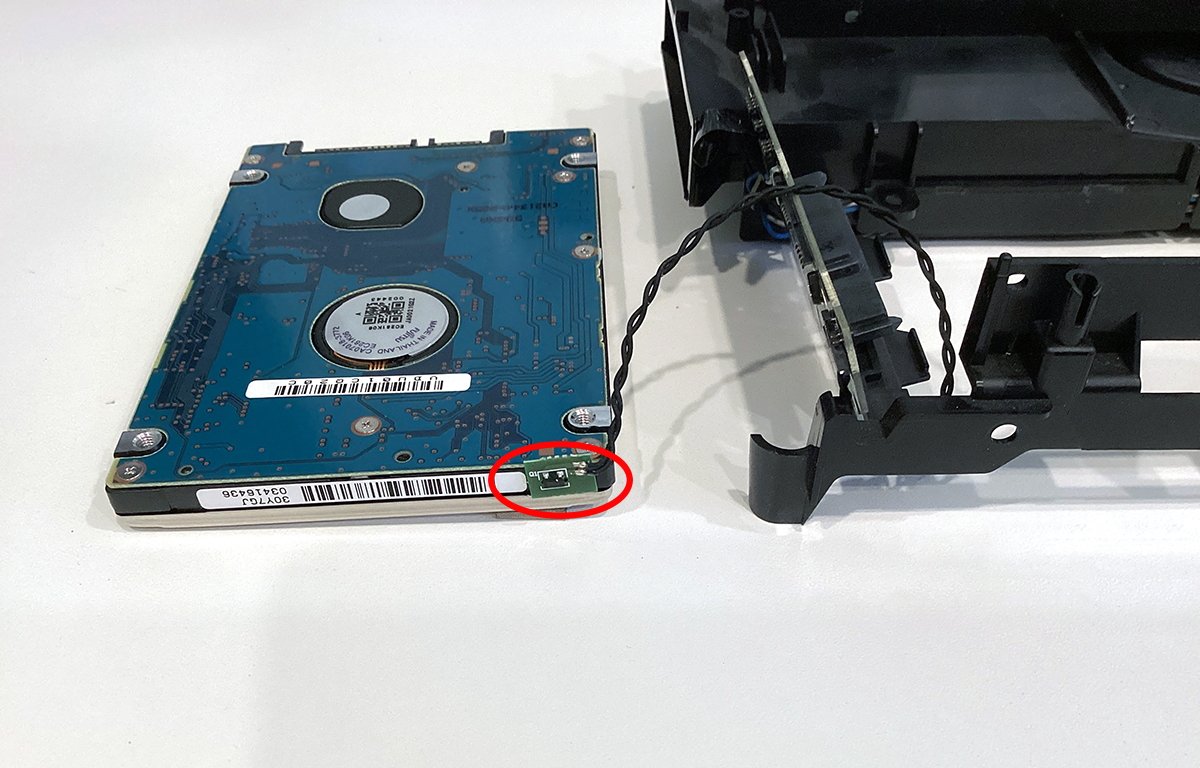
The laborious drive’s thermal sensor.
As soon as cleaned, exchange the two.5-inch laborious drive with a brand new SATA SSD of your selection. We used an additional 128GB SSD however bigger ones will work simply positive. Amazon has 1TB SATA SSDs for lower than $100, and so they make a pleasant improve.
Mac OS X Snow Leopard installs positive onto a 128GB SSD so you will not want a big one.
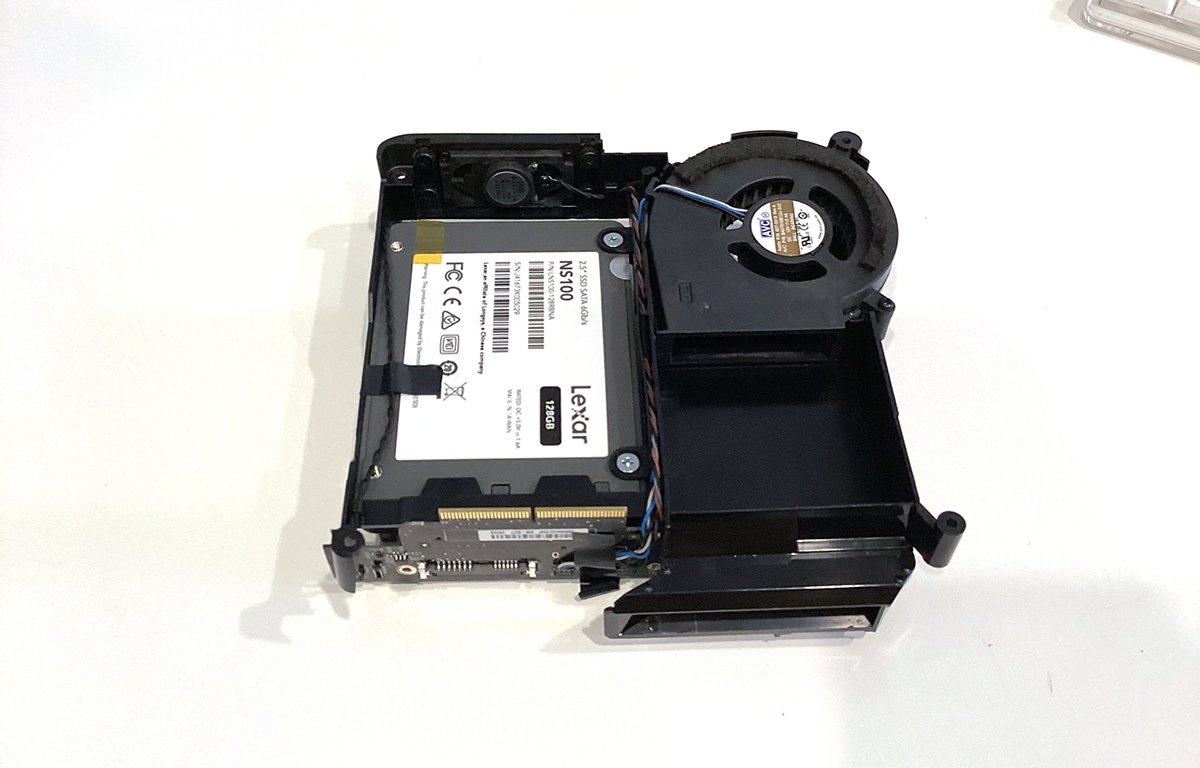
New SSD drive put in in Mac mini 2.26GHz drive provider.
As soon as the brand new SSD is put in, reapply the thermal sensor and two small high pads from the previous laborious drive onto the brand new SSD. You will not want the thermal sensor for the SSD however reapply it to the drive anyway to forestall malfunction.
Plug the SATA drive board again into the rear of the brand new SSD. It is held in by nothing however friction.
If there was a small piece of black tape holding the thermal sensor wire to the underside of the laborious drive, reapply it now to the underside of the SSD in the identical place.

Absolutely cleaned and reassembled drive provider with new SSD.
After all the things is reassembled on the provider, merely drop it again onto the bottom unit in place. Rigorously press down on the highest of the SATA board to lock it into the SATA connector on the bottom’s motherboard.
Nothing else is required to reinstall the provider. Now merely re-install the 4 nook publish screws to the provider to safe it to the bottom.
Notice that when reinstalling the provider, be certain the three antennae wires are positioned appropriately: the right-side WiFi antenna wire sits on the rear of the machine between the exhaust vent and the small audio board.
The 2 Bluetooth antennae wires exit on the left aspect of the bottom.
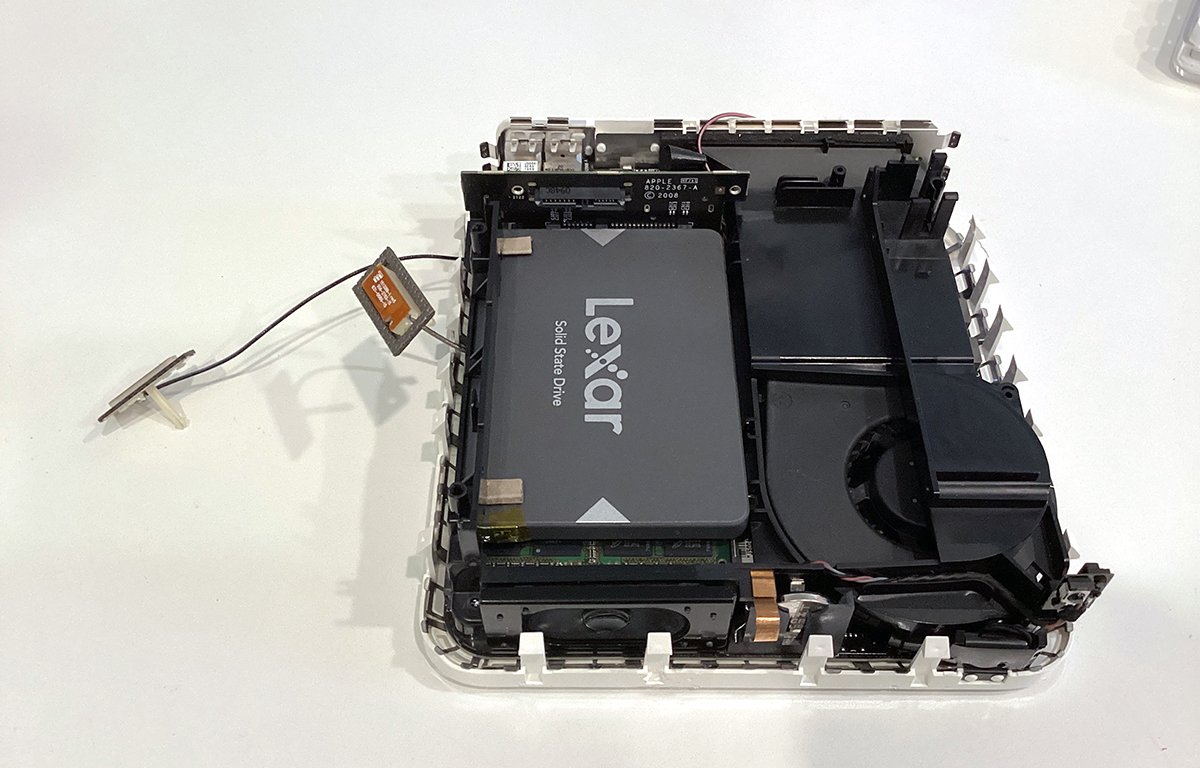
Absolutely reassembled base with drive provider put in.
Step 7: Re-install the DVD-R drive
Subsequent, reinstall the DVD-R drive to the highest of the provider by sliding it into place and re-attaching the rear SATA drive board to its rear connector. Reinstall the drive board’s two small screws.
Safe the 4 aspect screws holding the DVD-R drive in place.
Reinstall the three antennae springs on their posts on the highest of the provider, then snap the three antennae again onto the posts, ensuring the publish clips seize the antennae.
Re-attach the small ribbon cable on the again of the drive board to reconnect the SATA drive board to the audio board.
This completes the drive improve and the provider reassembly.
Absolutely reassembled Mac mini, apart from the quilt.
Step 8: Re-install the highest cowl
Make one remaining test of all the things on the machine earlier than you re-install the highest cowl.
In case your machine was very soiled you may additionally need to tip the bottom on its aspect and blow out the underside vent holes with compressed air. These holes are the place air enters the underside of the machine ought to the fan come on for cooling.

Absolutely cleaned and restored Mac mini – prepared for remaining meeting.
Subsequent, flip the bottom over and punctiliously re-insert it again into the highest cowl, however do not shut it but.
First make certain the steel safety clip and the small steel clips alongside the rear of the bottom line up with the within fringe of the lid. If these clips do not line up, the lid will not shut all the best way and you will be left with a niche within the case.
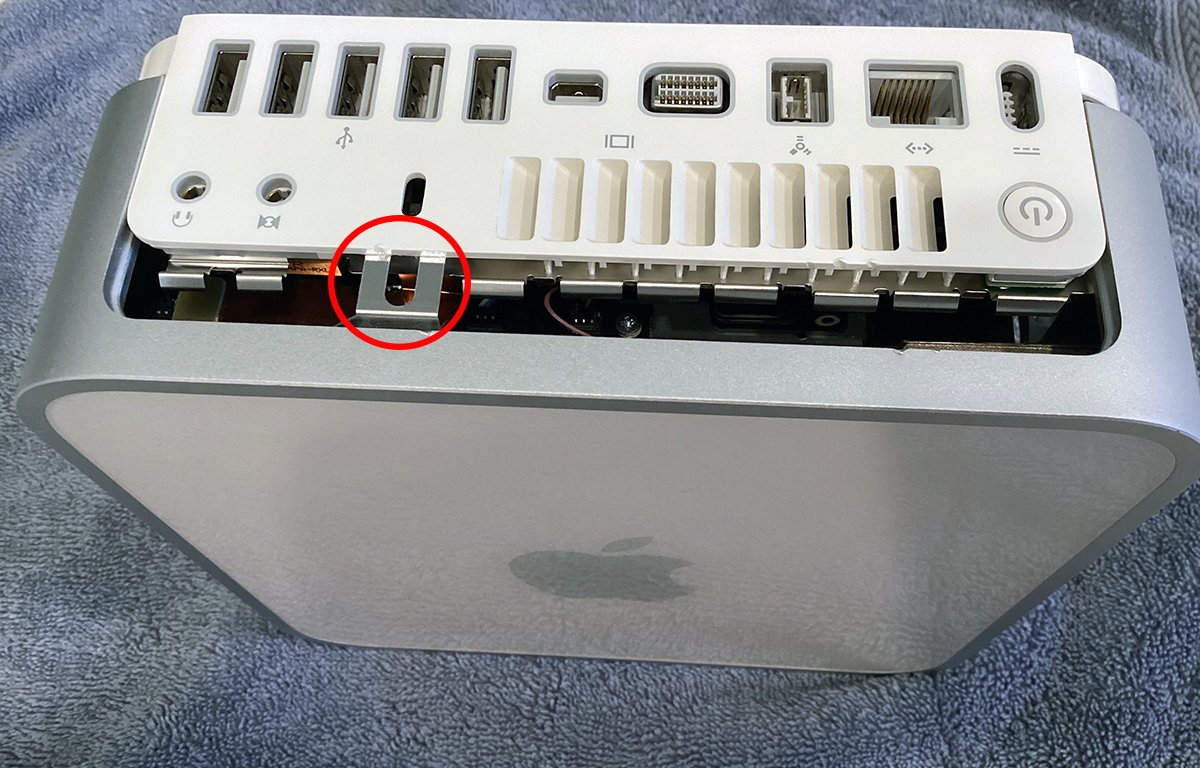
Be certain that the clips line up.
As soon as all the things is lined up, and from a standing place, with fingers turned outward and palms going through down, give the bottom one strong push downwards into the lid. This could seal the case.
It’s best to hear a pointy click on as each the plastic clips and the steel clips interact with the within of the lid.
Case place earlier than remaining closure.
You ought to be left with no gaps by any means wherever on the case.
If there’s a hole on the rear of the case you will must pry the bottom free once more with the spackling knife and check out once more.
A well-sealed case ought to look one thing like this:

Accurately re-sealed lid: no gaps wherever across the rear, or the underside.
Step 9: Energy on and set up software program
As soon as the machine is absolutely reassembled, it is time to check it.
Plug within the energy brick, a show adapter, and a USB mouse and keyboard. In our instance we’re utilizing the Apple mini DisplayPort to VGA adapter, however you may also use the mini DVI adapter when you’ve got one.
Any USB mouse will do, however the minis had been initially designed for use with the clear and white Apple USB keyboard (A1048). We’re fortunate sufficient to nonetheless have one new, in mint situation:
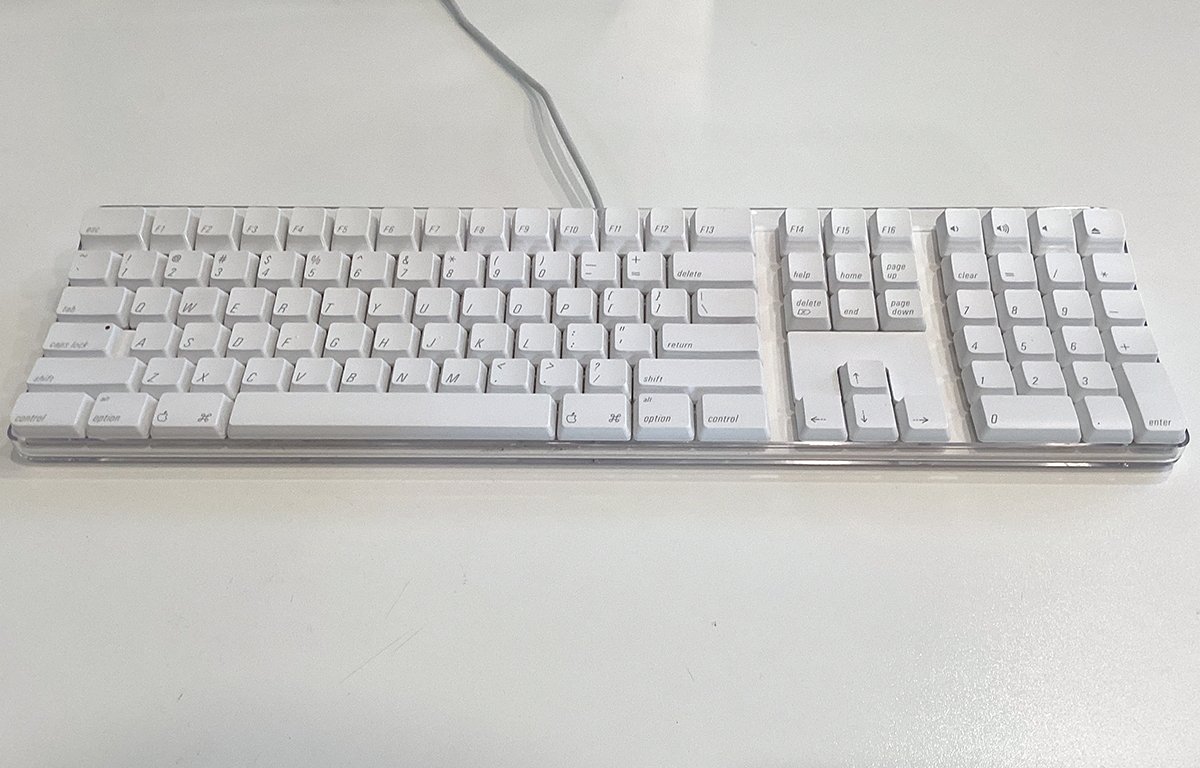
Apple wired USB keyboard.
You may want the Apple keys on the USB keyboard to start out up from a DVD or exterior drive.
Plug the opposite finish of the video cable right into a monitor. For our instance we’ll be utilizing a recycled Acer V173 15-inch VGA monitor from Goodwill which solely price $10.
Smaller trendy 16:9 screens also needs to work positive, if they’ve VGA or DVI inputs.
You possibly can join two shows if you happen to like. As soon as all the things is related, press the ability change and wait.
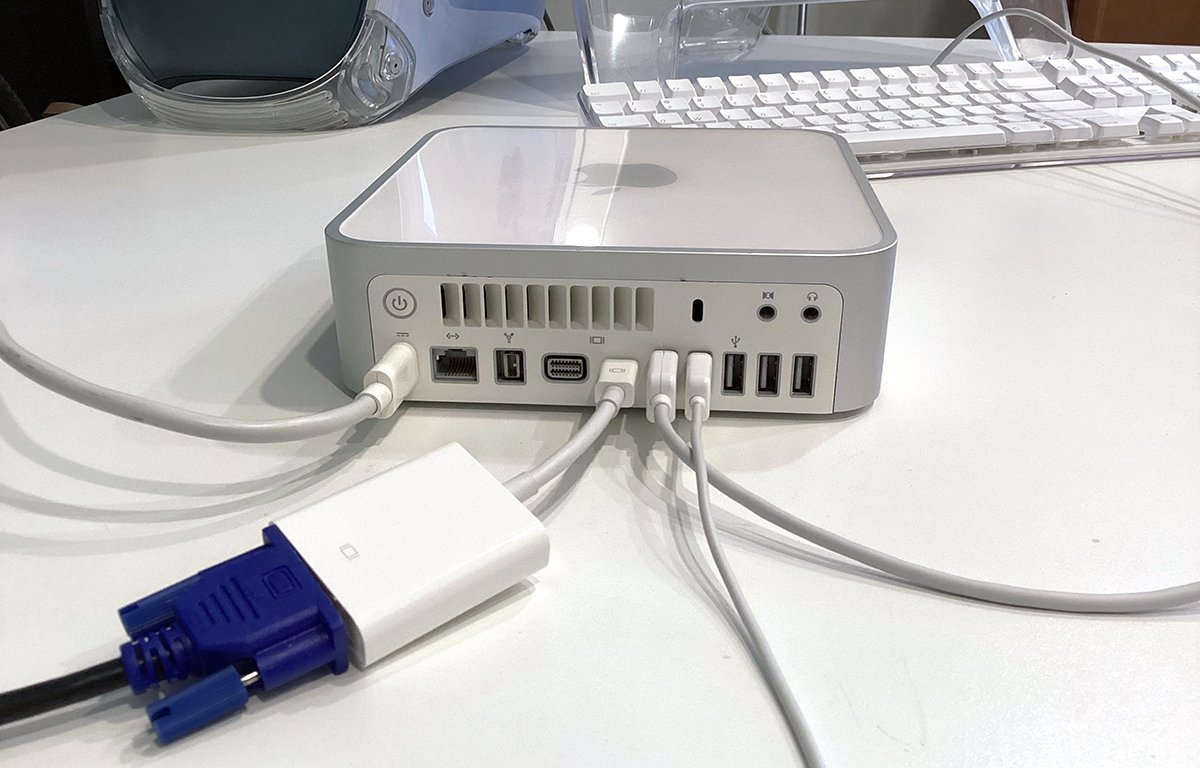
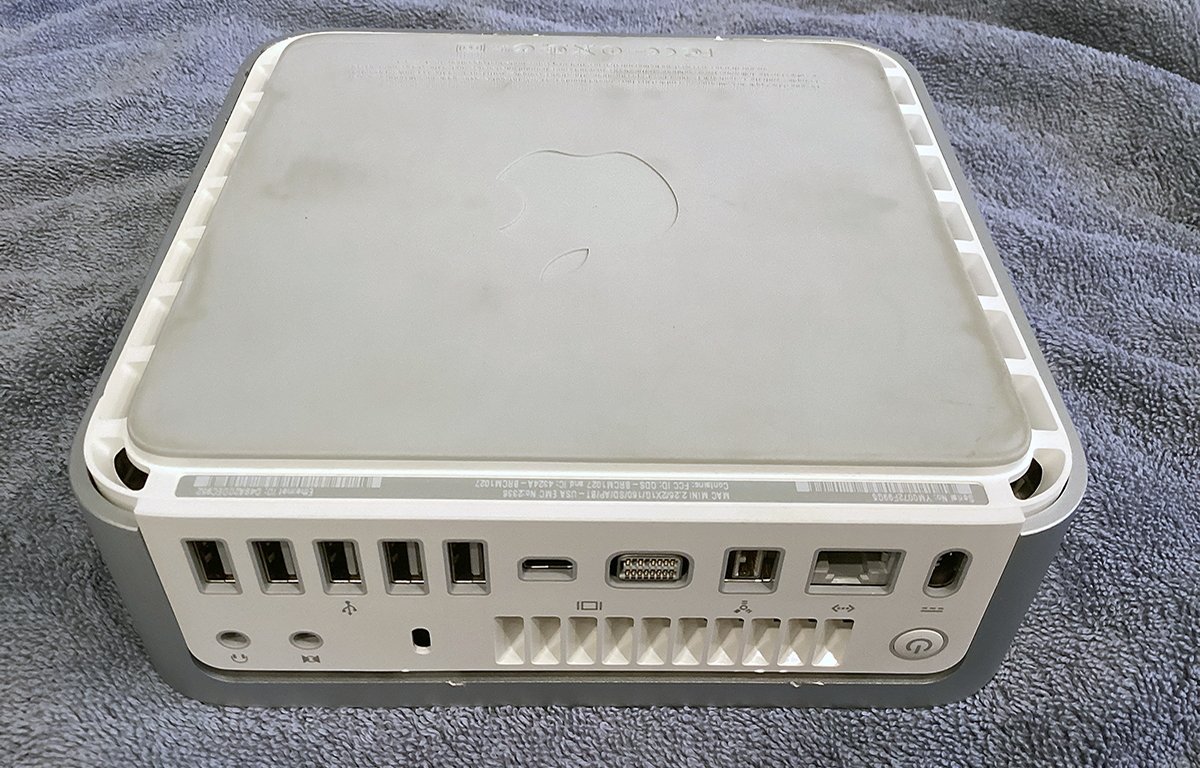
Rear connections: energy, Ethernet, FireWire 800, mini DVI, mini DisplayPort, USB.
If all the things goes based on plan, you must see a gray display screen adopted by the flashing folder icon indicating there isn’t a OS to load.
Subsequent, insert the Mac OS X set up CD that got here with the machine, or a retail copy of the Mac OS X DVD. As quickly as you insert the DVD, it ought to spin up and Mac OS X ought to begin to load.
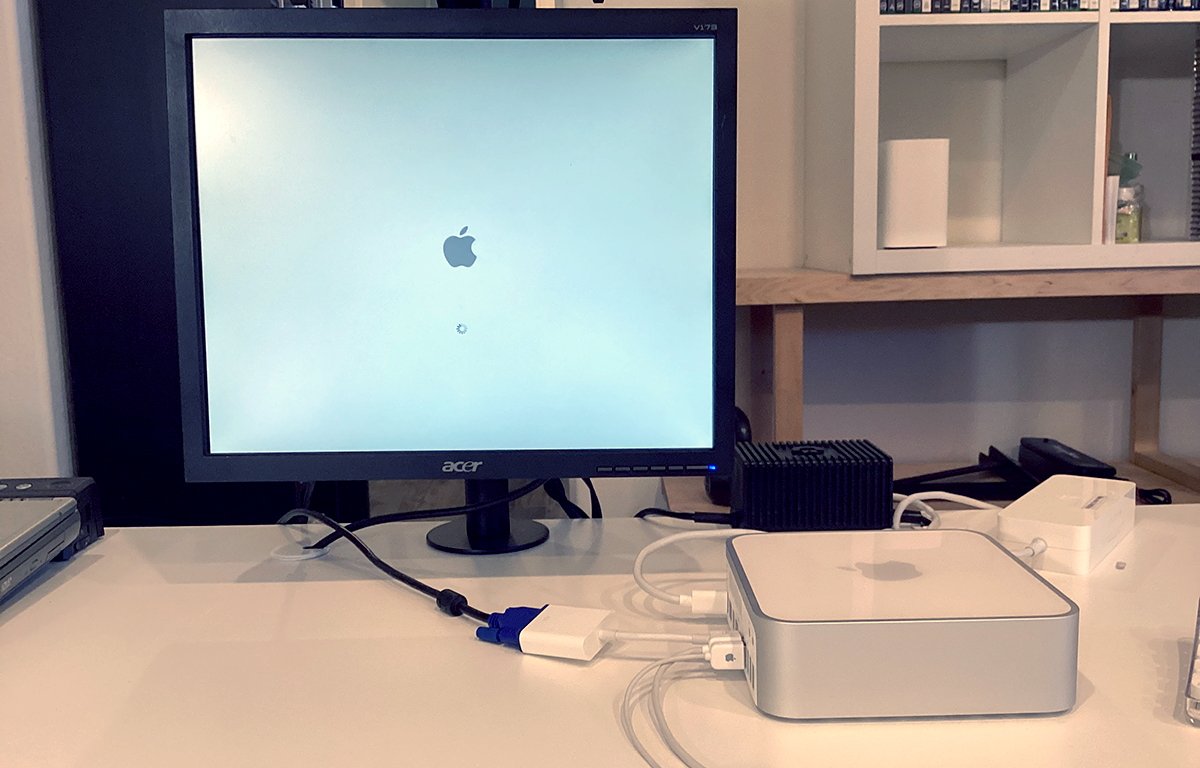
Booting: the soul of a brand new(ish) machine.
As soon as the Mac OS X installer hundreds, choose Disk Utility from the Utilities menu, format the inner drive as Mac OS Prolonged (HFS+), after which exit Disk Utility.
Again within the installer you will see the drive you simply formatted. Choose it and click on to proceed set up.
There’s additionally an Choices button within the installer which lets you choose further parts to put in.
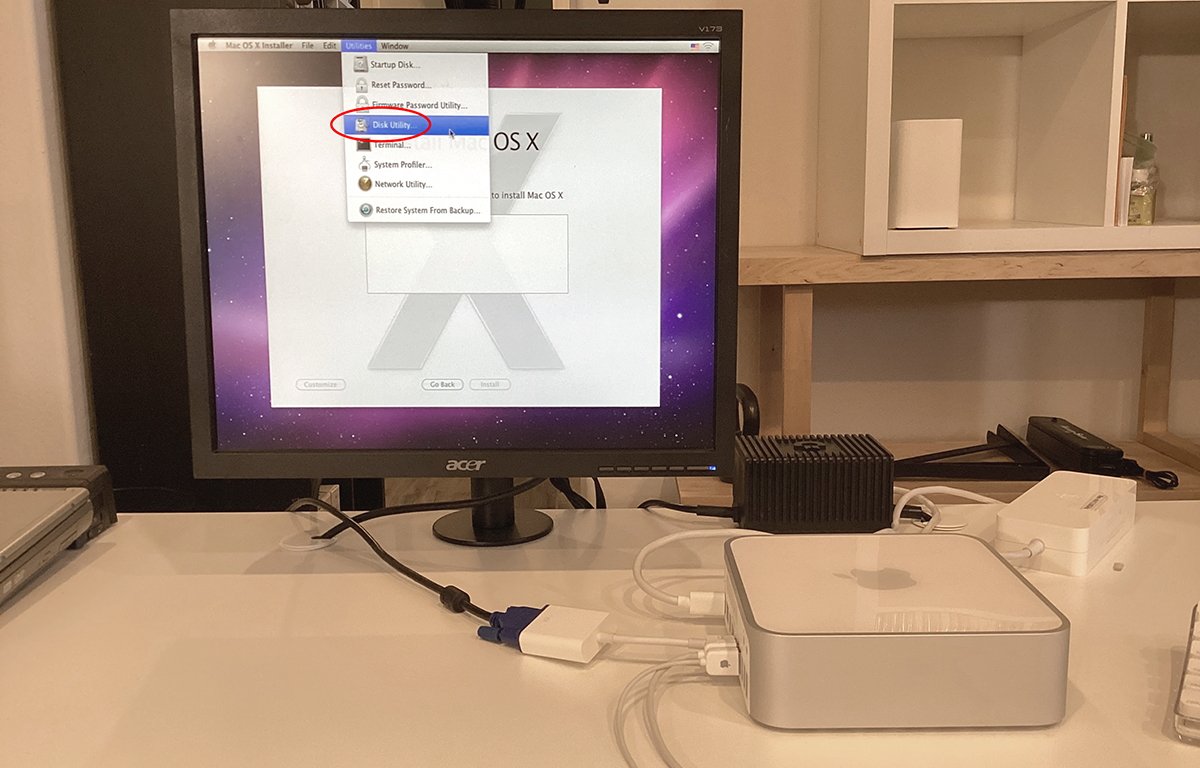
Choose Disk Utility to erase the inner drive.
The set up can take wherever from thirty to sixty minutes so be affected person. As soon as the installer is finished, you will must arrange a consumer identify and password for login.
As soon as that is executed, restart the machine.
After restart you will be requested to undergo a number of steps to complete organising Mac OS X, together with connecting to a WiFi community.
When you end all these steps, you will be left within the Finder.
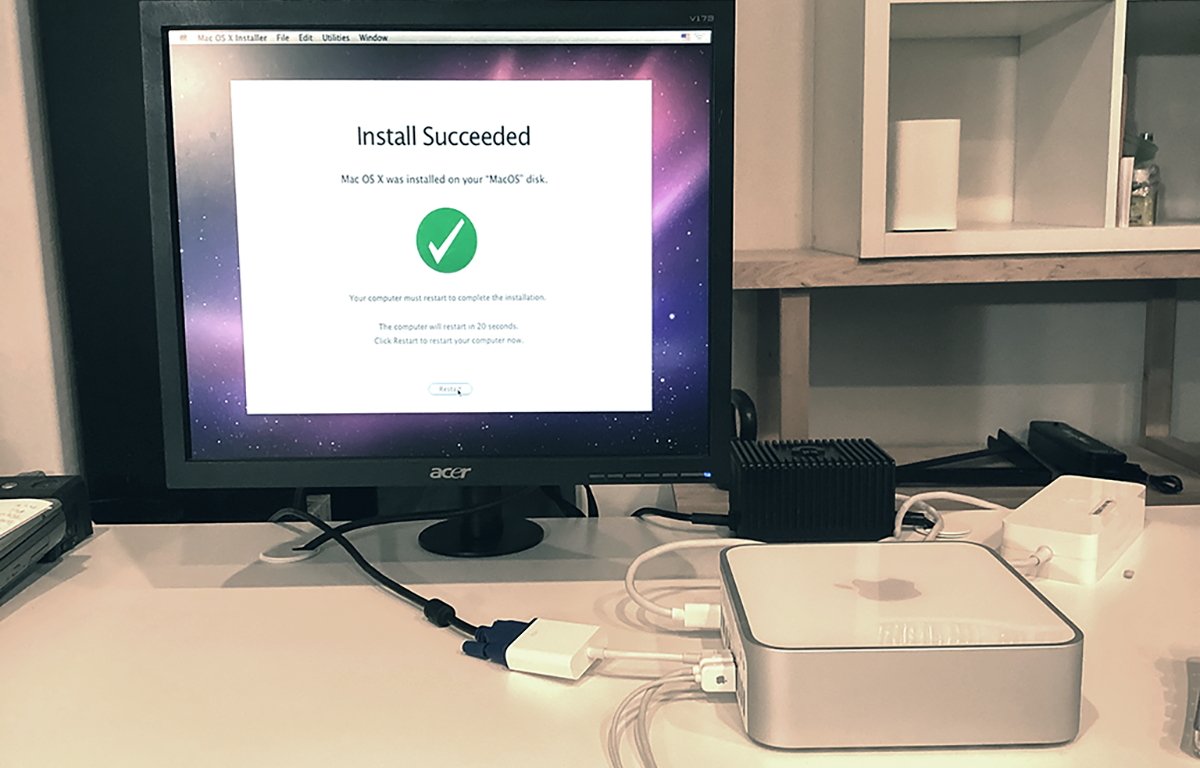
Mac OS X set up full. Reboot.
Subsequent, open System Preferences within the Dock, and run Software program Replace. Apple nonetheless maintains the Snow Leopard replace servers so you possibly can obtain and set up any updates from there.
As soon as software program replace is finished, Restart. Again within the Finder set up the Apple Functions DVD that got here with the mini and set up any additional apps you need similar to iMovie and GarageBand.
The two.26GHz Mac mini can run as much as Mac OS X El Capitan 10.11.6 launched in 2018, so if yow will discover that installer on Apple’s Help web site, or the App Retailer you possibly can set up it for an improve.
El Capitan requires 2GB RAM minimal.
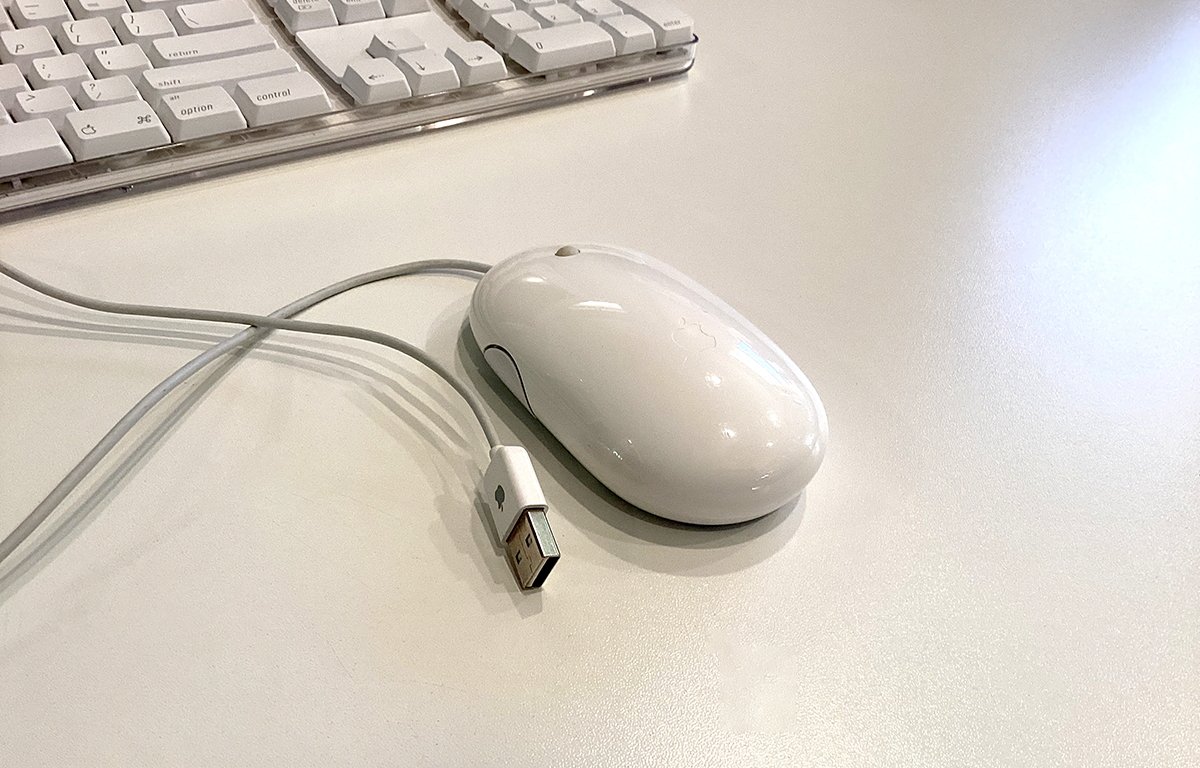
Apple’s 2nd-gen white wired USB mouse (A1152 EMC No: 2058).
Step 10 (Non-compulsory): Run Home windows
This mannequin of Mac mini is able to operating both Microsoft Home windows XP or Home windows 7. The included Boot Camp utility within the /Utilities folder means that you can partition the inner drive and set up Home windows onto a type of partitions.
You may want an genuine copy of the Home windows XP or 7 installer, and a legitimate Home windows serial quantity. You may as well use a legitimate Home windows installer .iso file in Boot Camp when you’ve got one.
The Boot Camp Assistant could or could not additionally ask you to insert a USB thumb drive to obtain parts to, so have one helpful simply in case.
In fact, if you want you possibly can run both of the Home windows installers and take over the whole inside SSD and switch the mini right into a Home windows machine, however with the power in addition each you will in all probability need to set up each.
To take action, run Boot Camp, choose the inner drive, set the partitioning divider to dimension each partitions, then step by the set up course of. Insert your Home windows DVD set up disk when prompted.
Boot Camp will re-partition the drive and reboot into the Home windows installer. Home windows will get put in onto the second partition, whereas your Mac OS X set up is left alone on the primary.
Step by the Home windows installer and enter your serial quantity when prompted.
Apple’s Boot Camp Assistant.
As soon as Home windows installs, reboot and maintain down the Possibility key on the keyboard. This enters the boot quantity selector the place you possibly can click on both the Mac or Home windows quantity because the Startup Disk in addition from.
You may as well set which quantity in addition from in System Preferences within the Startup Disk pane so you do not have to carry down the Possibility key subsequent time when beginning up.
Being able in addition Home windows from a Mac is helpful, and initially it was one of many main promoting factors of the early Mac minis.
With an SSD drive put in, the two.26Ghz Mac mini is definitely fairly quick. Ours booted into Mac OS X in underneath three seconds.
Shutdown is equally quick and took solely two seconds.
Earlier variations of Mac OS X had much less software program bloat and so generally had been quick.
There are additionally a variety of attention-grabbing obtainable third-party upgrades on the market on-line, such because the OWC Knowledge Doubler which lets you exchange the inner DVD drive with a second inside SSD through the use of a particular bracket.
For a completely full retro expertise, make sure you choose up some previous VST FireWire drives similar to a tough drive or exterior CD-R drive.
The later mannequin Mac minis from the polycarbonate collection had been well-designed, and nicely made. A lot of them are nonetheless operating at the moment – and with a little bit work can nonetheless be upgraded and restored to be fairly helpful.
[ad_2]